
Digital Currency Systems, Inc.
ATS
Quick Start Guide
USER GUIDE
V5.2.0.25
7/2005
About ATS
This guide is meant for first
time users who will be using the ATS system.
ATS is a computer program
that makes life easier for tellers as well as owners. It speeds up transactions and cuts down
customer wait time. Money orders no
longer have to be written by hand.
Checks can be verified against the databases of other stores.
ATS is designed for stores
that need to keep track of cash and inventory, as well as perform customer
transactions. It is customized for each
location. Because different stores offer
different services, the list of transactions in your menu are specific to your
location. DCS helps by setting up these
menus for you.
Let’s start by opening ATS on
your computer.
Opening ATS
Locate the following icon on
your Desktop.

Use the mouse to double-click
on the ATS for Windows icon as shown
above.
Alternatively, click on the
icon once to highlight it and press the Enter
key.
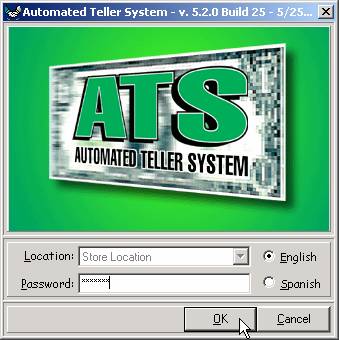
The ATS system keeps track of
who is opening the program by the password entered here. Your password should already have been set up
by DCS or your manager.

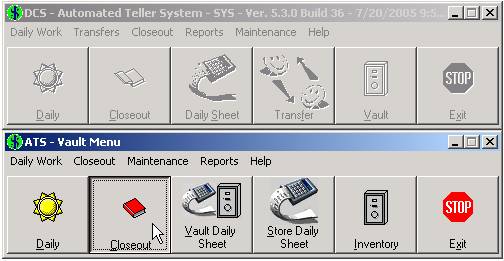
The menu above opens in the
top left corner of your screen.
The Teller Drawer
All customer transactions are
processed from the teller drawer. For
each teller, ATS keeps track of all customer transactions as well as drawer Inventory.
Inventory
There are many different
types of inventory that can be held in a drawer. Stamps, cash, and bus passes are just a few
examples. Whenever inventory is moved
into or out of a drawer, it must be recorded in ATS.
In order to get started doing
customer transactions, we must first build
the drawer. Building the drawer
simply refers to transferring inventory from the Vault to a teller drawer.
The Vault
The Vault refers to the safe
where inventory is held. As far as ATS
is concerned, the Vault works a lot like any other drawer. The only real difference is that customer
transactions are not processed through the Vault. In place of customer transactions, the Vault
is set up to handle transfers with the Bank.
Just like with the drawers,
inventory that is moved into or out of the Vault must be recorded in ATS.
How to Build the Teller Drawer
We will now go over how to
move inventory into the teller drawer.
In this example, we are assuming the Vault already has inventory in it.
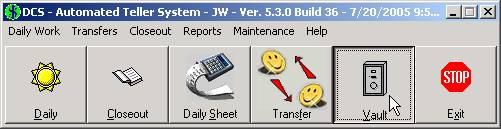
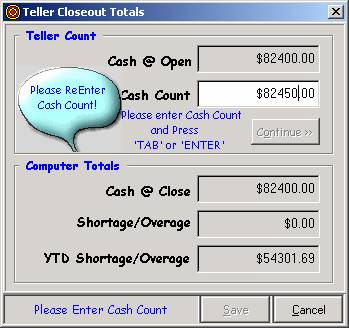
Click on the Vault button.
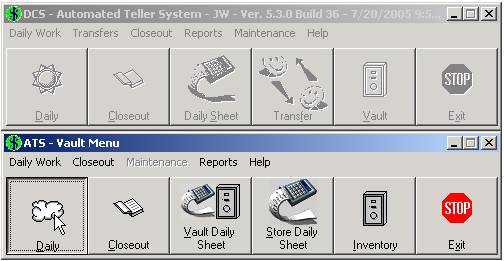
A second menu (the Vault
Menu) comes up beneath the original screen.
Click on Daily.
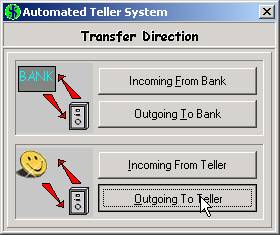
Click on Outgoing To Teller to send
inventory from the Vault to the teller drawer.
Another screen appears with a
list of tellers that are currently logged into ATS. Choose your name from this list.
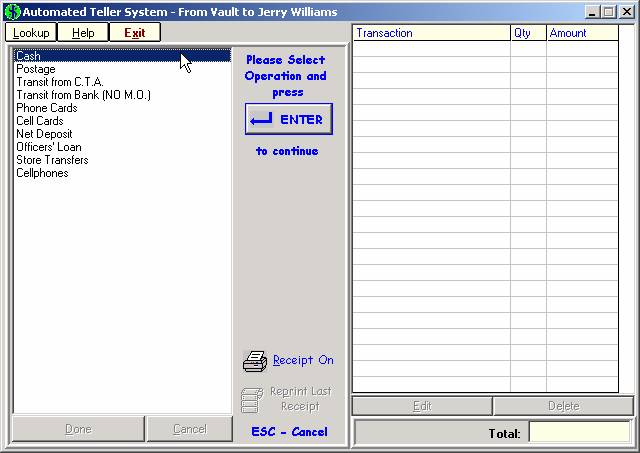
The menu on the left
represents the inventory stored in the Vault, most of these containing submenus
where the individual items are listed.
Because different Stores carry various types of inventory, this menu is
customized for each location.
Let’s start with Cash. Double click on the item marked Cash.
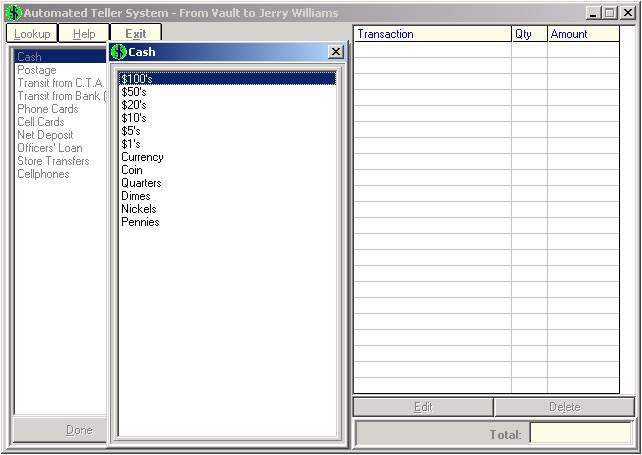
Use the up and down arrows on
the keyboard to choose the type of cash or coin, then press Enter.
Or if you prefer the mouse, double click on any of the items in the
menu.
In this example, we will
start with $100s and work our way down.
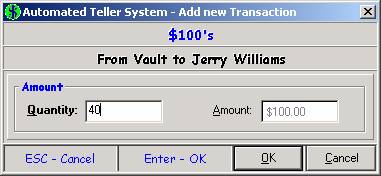
Enter the quantity of
hundreds to be transferred. Click OK.
Repeat this process for the
different dollar amounts and for the rolls of coin. The transaction list on the right fills in as
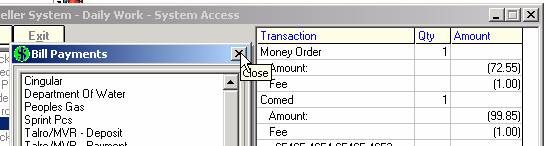
these values are entered.
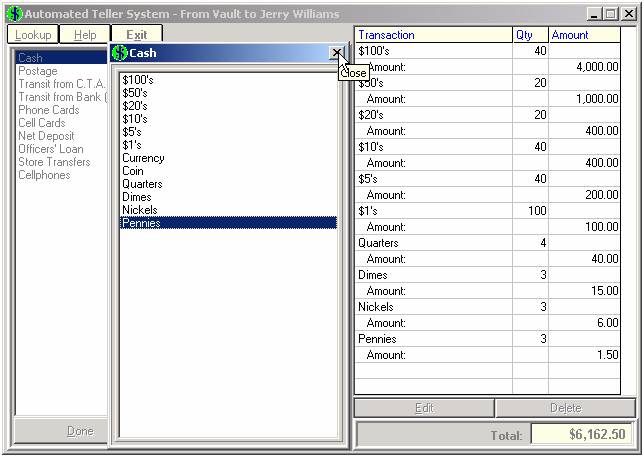
Once all the cash has been
entered, close the submenu by clicking the X as displayed above. Or, press the escape key.
Repeat the above steps for
additional inventory items. In our
example, the user goes on to click on Postage and transfers 28 stamps.
Click Done.
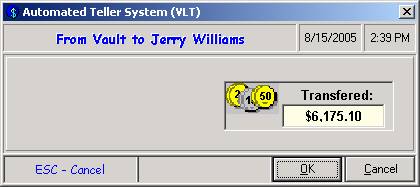
A final window appears verifying
the direction of transfer and the value of inventory. Click OK
if this is correct to complete the transaction.
Cancel returns to the
previous screen where adjustments can be made.
Exit out of the Vault menu
Press the Escape key to close the Vault transfer
screen, and Escape again to close
the Transfer Direction screen.
You should be back at the
Vault Menu screen below.
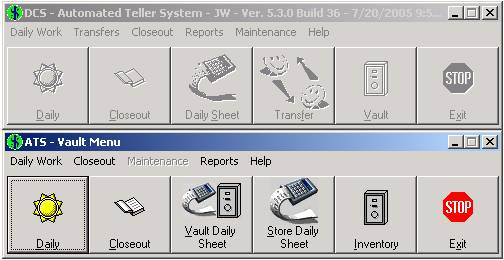
Click the Exit button to return to the
main menu.
Teller Daily Sheet
The Daily Sheet is an incredibly
useful tool for tellers. At any time,
tellers can view what should be in
their drawer. Why does this come in
handy?
A customer claims to have
been short-changed. The teller looks at
the Cash @ Close on the daily sheet,
counts the drawer, and immediately knows if the customer has a legitimate
claim.
Viewing the Teller Daily Sheet

Click on the Daily Sheet button.
The Teller Daily Sheet is
generated and displayed on the screen.
Teller Daily Sheet Example
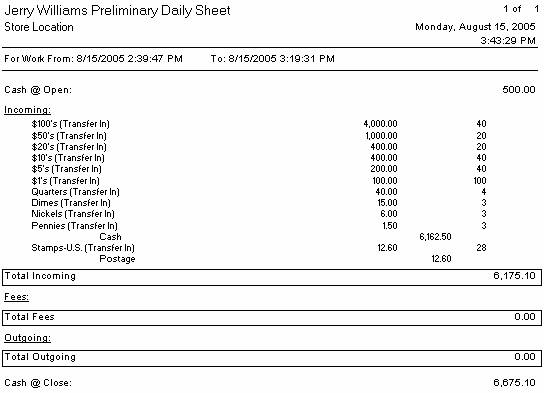
The Vault transfer described
above is reflected in this daily sheet.
When building the drawer, we transferred $6,175.10 worth of inventory
from the Vault. Any transaction that increases
the value of the drawer posts Incoming.
The other two sections of a
daily sheet are Fees and Outgoing. Any transaction that affects the value of the
drawer posts in one of these three sections.
At the top of the daily sheet
is the Cash @ Open. This value represents the amount residing in
the drawer from the previous day. The Cash @ Close, at the bottom of the
screen, is the current value of the teller drawer.
Customer Transactions
All customer transactions are
performed from the same screen.

Click on the Daily button.
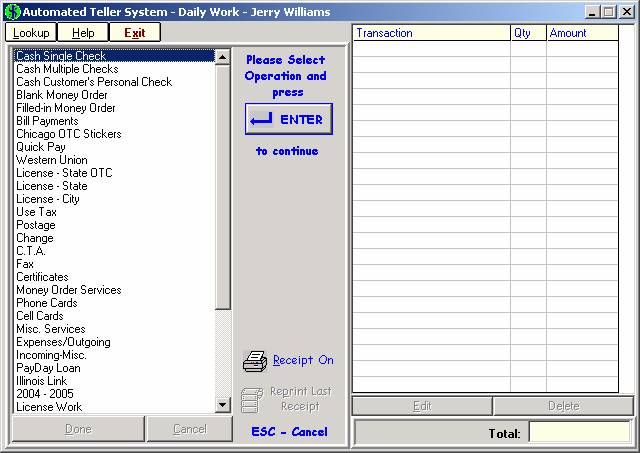
Browse through the different items
on this list. Some of them lead to
submenus where the individual transactions are listed.
We will now go over four of
the main types of transactions: Printing a money order, processing a bill
payment, selling a stamp, and last but not least—cashing a check.
Printing a Money Order
There are two entries in the
transaction list, Blank Money Order
and Filled-in Money Order.
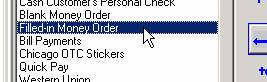
Find these items in your menu
and double click on Filled-in Money
Order.
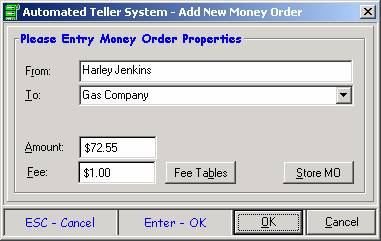
Fill in the
from and to fields with information provided by the customer. Then fill in the amount.
Click OK. The fee fills in
automatically.
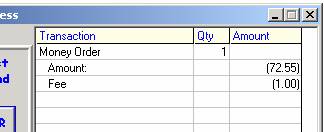
The transaction is now listed
on the right side of the screen.
Processing a Bill Payment
Find the Bill Payments item in
your menu.
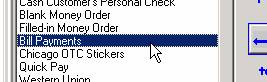
Double click on it with the
mouse. You can also use the up and down
arrows on the keyboard and press Enter.

A list of utility companies
comes up on the screen. Find the correct
item and double click on it.
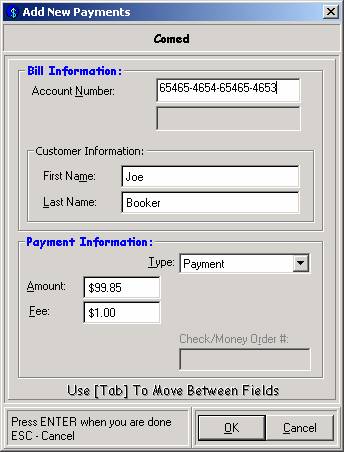
Fill in all relevant fields
and click OK. The fee fills in automatically.
The bill is now listed on the
right. Click the X to close the submenu.
Selling a Stamp
Locate the item marked Postage on the left.
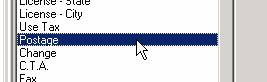
Double click.
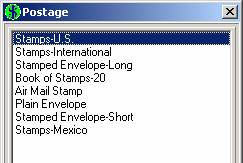
Choose the US Stamps option
from the submenu.
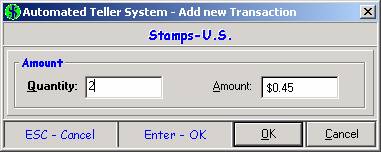
Enter how many stamps the
customer wants in the Quantity
field. The amount should already be
filled in with the correct value.
Click OK.
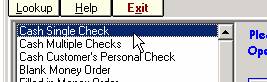
Cashing a Check
Double click Cash Single Check.
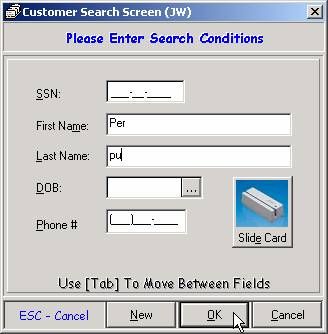
for new customers, click new and enter their address and
employment information
enter and click ok
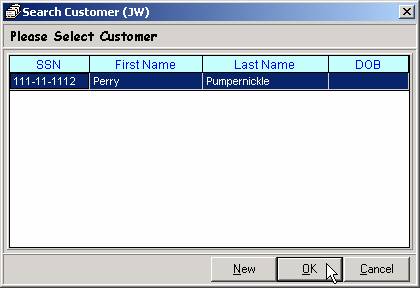
find the customer from this list. Click OK.
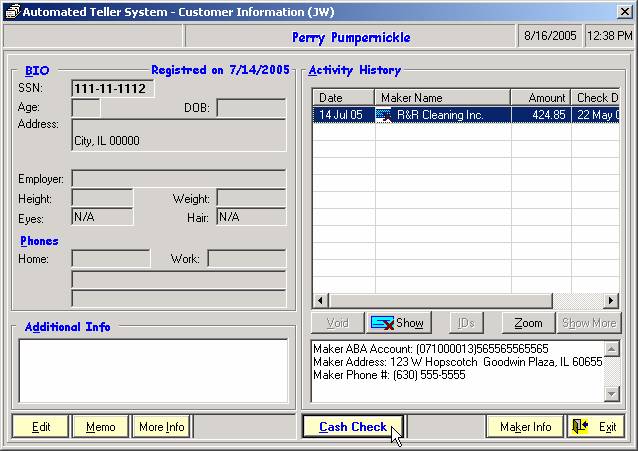
A warning may come up before
the customer info screen above. Read the
warning message and press the
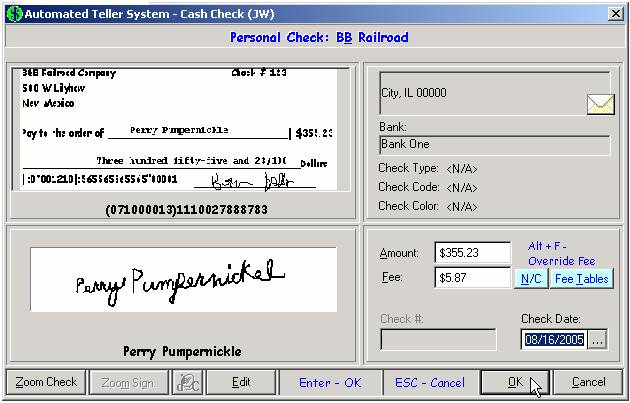
Scan the front of the
check. If required, scan the back as
well.
Complete the Transaction
As different transactions are
processed, they are listed on the right side of the screen.
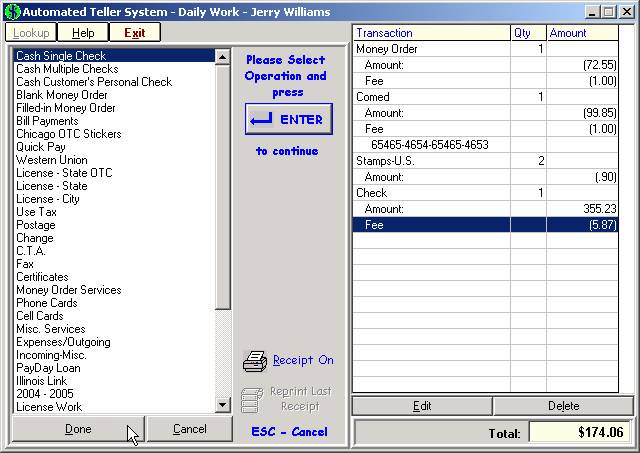
Click the Done button to complete the
customer transaction.
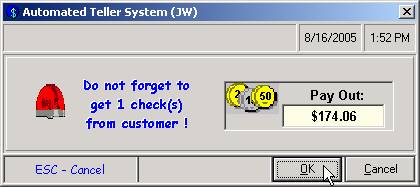
The final screen displays the
amount collected or paid out to the customer.
In this case, there is a pay out of $174.06.
Teller Closeout
Once all customer
transactions have been entered into the system, there is that last step before going
home—closing out. The main purpose of
closing out is matching up your counted drawer value (or cash count) with what
the computer says you have.
The general procedures at the
end of the day do not change. Add up all
your checks for the deposit. Get a total
for your bills and anything else that is verified at closeout. Count the cash and coin, stamps, and any
other inventory in your drawer.
Then, through the ATS
closeout, these values are compared to what the computer has totaled. If the values match we know that they are
accurate.
How to Closeout Your Drawer
We will now go through an
entire closeout procedure.

Click on the Closeout button.
1.) Click Start once the Teller Closeout window
appears.
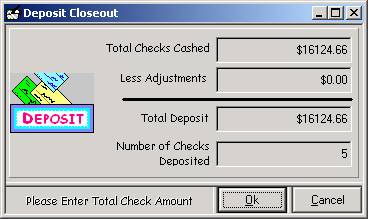
2.) The total amount of
checks cashed is displayed in the Deposit window. Click OK
if this is correct.
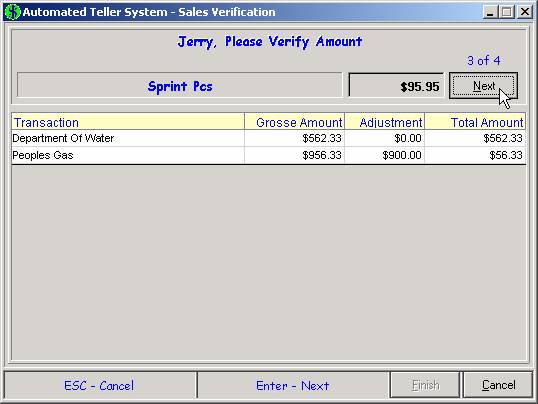
3.) Any sales that require
verification, for example bill payments, are verified here. Click the Next button for each correct amount. Once all sales have been verified, the Finish button is enabled. Click Cancel
to stop the closeout procedure if any of the amounts displayed do not match
teller records.
4.) The money orders print
for any liabilities that are set for teller closeout.
5.) The Teller Daily Sheet is
displayed. Click the X in the top right
corner after viewing it.
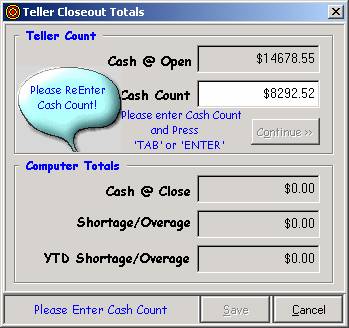
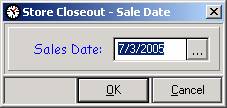
6.) The Cash Count is the total value of the
teller drawer, including inventory items such as stamps. Type in the Cash Count and press Enter.
Then, as the bubble in the example above indicates, the cash count must
be re-entered. If the values match, the Continue button is enabled. Click here.
7.) The computed totals are displayed,
calculating the day’s shortage or overage.
If an unacceptably large difference results, it may be necessary to click
Cancel and track down any
mistakes. Otherwise click Save to continue.
8.) The Teller Daily Sheet prints.
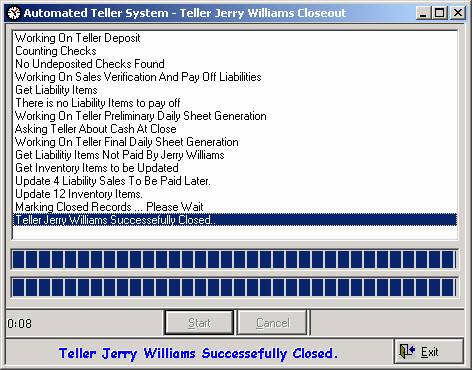
The Teller Closeout window is open throughout the closeout procedure,
displaying a step by step log. The final
event listed is Teller Successfully
Closed. The Teller is not closed out
until this message is displayed.
The closeout can be canceled
during any of the previous steps by clicking Cancel. To pick up
where you left off, click the Closeout
button on the main menu again. Steps
that were completed before a canceled closeout are not repeated.
Store Daily Sheet
The Store Daily Sheet can be
viewed at any time throughout the day. Any
transactions that affect the value of the store are included in this
report. It allows the user to view the current
value of the Store at any time-- that is, the total value of all Teller drawers
together with the Vault.
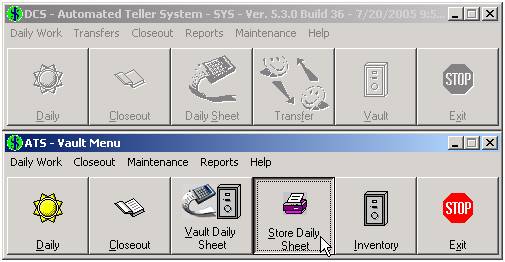
Click on the Vault button, and then on Store Daily Sheet.
Store Daily Sheet Example
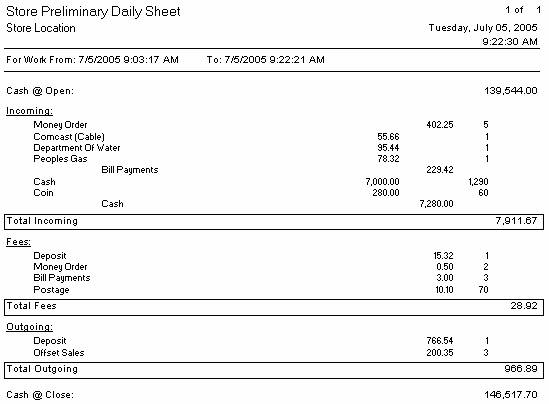
Just like the Teller Daily
Sheet, the Store Daily Sheet is divided into three sections. There is Incoming, Fees, and Outgoing. These three sections include any transaction
that would affect the value of the Store.
At the top of the report is the Cash @ Open, which is the value of the
store at the beginning of the day. Once
the totals of these three sections are added to the Cash @ Open we get the
current value of the store, or the Cash @ Close.
Store Closeout
The final step of the day is
closing out the Store. There are fewer
steps involved in closing out the store than the teller, and following a few
suggestions makes the process a lot easier.
First, Print the Vault Inventory Report
The Vault Inventory report lists
the quantity of each item stored in the Vault.
By printing this first, you can simply bring it over to the Vault and
check the items off as you verify them.
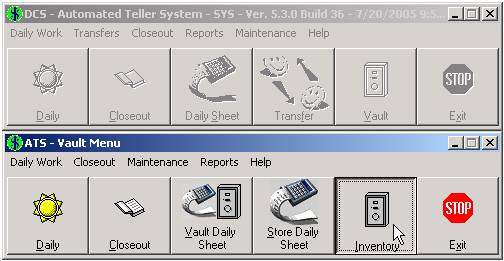
With the Vault menu open,
click the Inventory button.
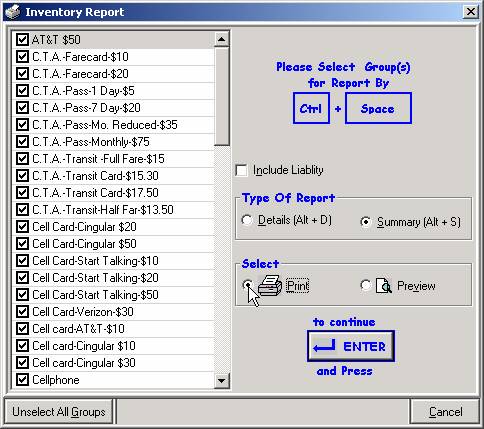
Choose the Print option to send the report
directly to the printer. Then press Enter.
Make note of any differences between this
report and what is physically in the Vault.
Click the Closeout Button
Once all tellers are closed
and the Vault has been verified, click the Closeout
button.
Click Start once the Store Closeout screen appears.
The Store closeout can be
divided into nine steps described here:
1.) Money Orders are printed
for all liabilities. It is recommended
the user verifies the amount and number for each money order printed.
2.) The Vault Daily Sheet
appears on the screen. To continue,
click the X in the top right corner of the screen.
3.) Enter the Vault Cash
Count—remember, this is what you physically counted in
the Vault. This value must be entered
twice. Press Enter or click Continue
and the Shortage/Overage field
fills in with the calculated balance.
4.) The final Vault and Store
Daily Sheets are sent to the report printer.
5.) If the Store Daily Sheet
is sent to a main office, it is exported at this time. No user action is required for this
step.
6.) Verify that this is the
correct sales date by clicking OK. In some cases, for example if the Store
closes out the following morning, it may be necessary to overwrite this with the
correct sales date.
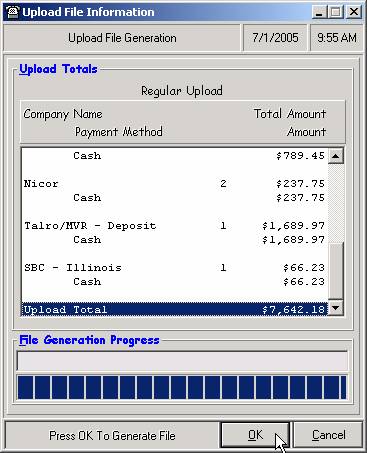
7.) A file is generated for
uploading bills. The total for each
utility is displayed on the screen.
Click OK to
continue. Another window appears with a
button marked Upload at the
bottom of the screen. Click here to
complete the upload process.
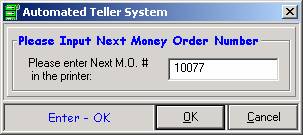
8.) Enter the money order
number that is currently in the printer.
If the number entered does not match the system records, the user is
asked to re-enter the money order number or edit the box information.

9.) For Stores with a main
office, settings are sometimes imported at closeout time. At this step, the system is checking for
updates and imports them if any exist.
No user action is required for this step. See the Store Setup section in ATS Setup for
details.
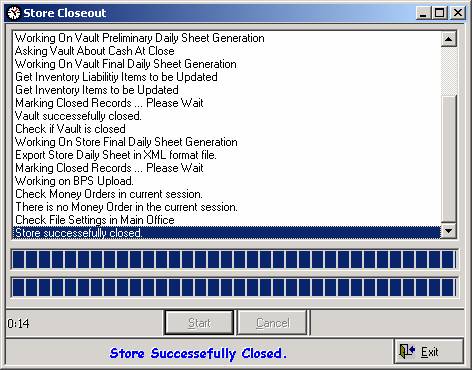
The Store Closeout window is open throughout the closeout procedure,
displaying a step by step log. The final
event listed is Store successfully
closed. The Store is not closed out
until this message is displayed.
The closeout can be canceled
during any of the previous steps by clicking Cancel. To pick up
where you left off, click the Closeout
button on the main menu again. Steps
that were completed before a canceled closeout are not repeated.
For more Information…
Go to the Help menu in ATS.
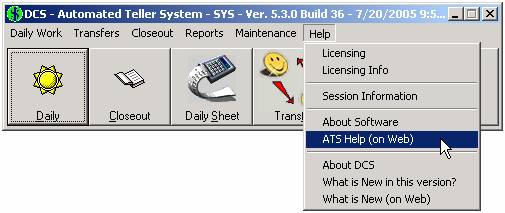
Click on ATS Help (on Web).
There you will find a
comprehensive documentation of all the ATS features and menu items.